Records & Consultation (for iTero users)
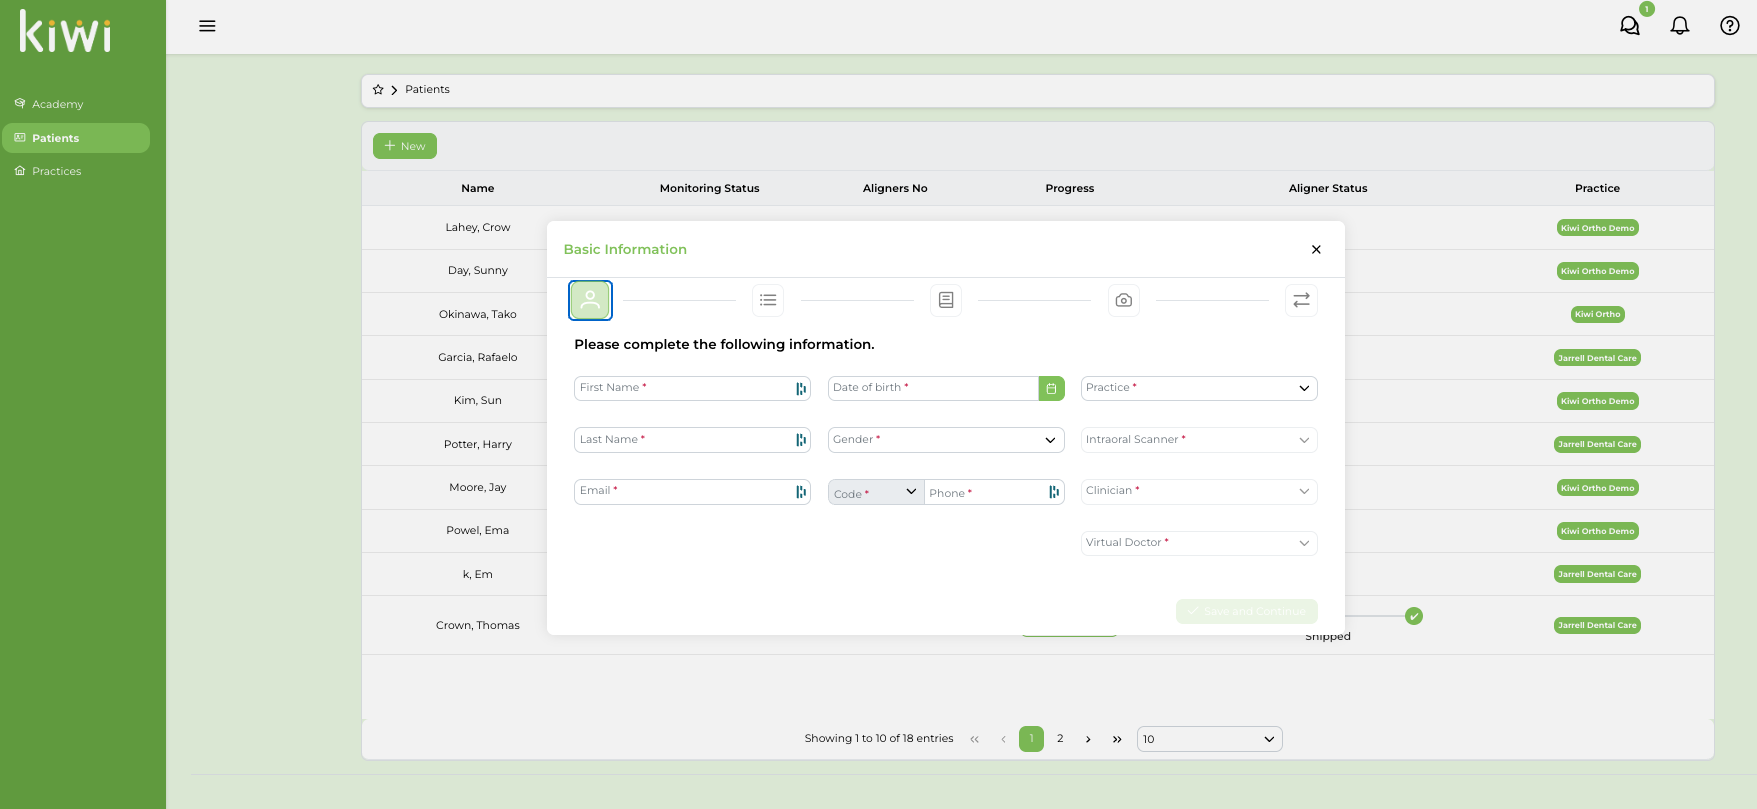
1. Create New Patient in Kiwi
- Log in to Kiwi, go to Patients and click on “New”
- Fill out the Basic Information
- Check out the boxes as you complete the steps in Records & Simulation.
- Use the Outcome Simulator in your iTero to create an outcome simulation.
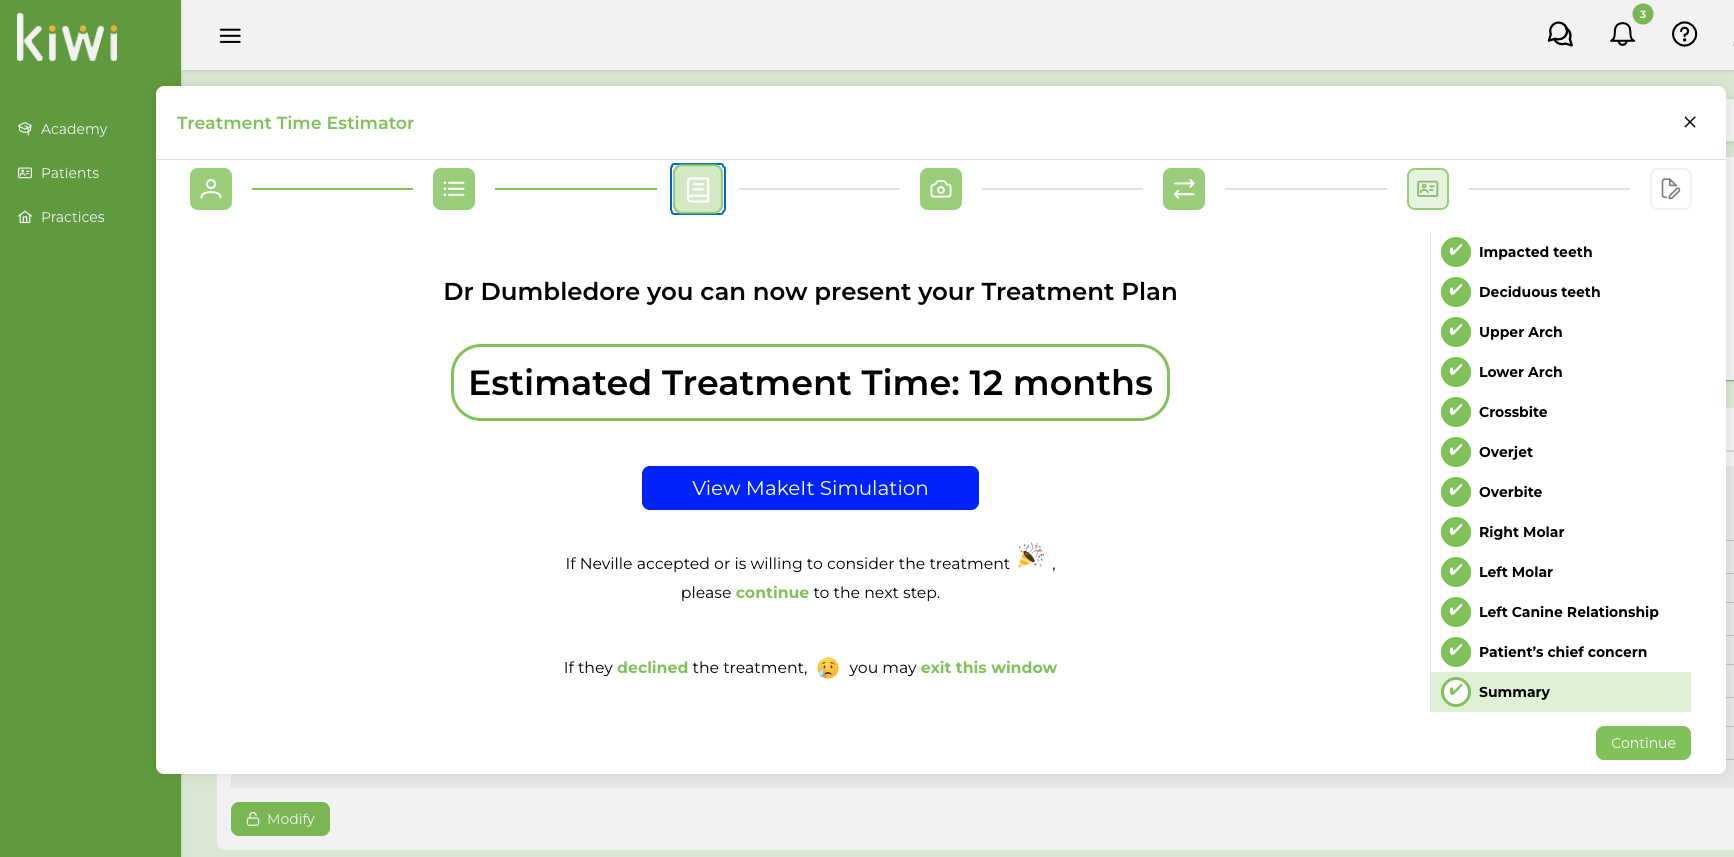
- Fill out the Treatment Time Estimator

2. Present the treatment plan to your patient
For this step use:
- The Treatment Time Estimator result
- The Outcome Simulation
- General information regarding aligner treatment and deciding on aligners vs braces.
3. Next Steps (if the patient accepts treatment or wants to think about it)
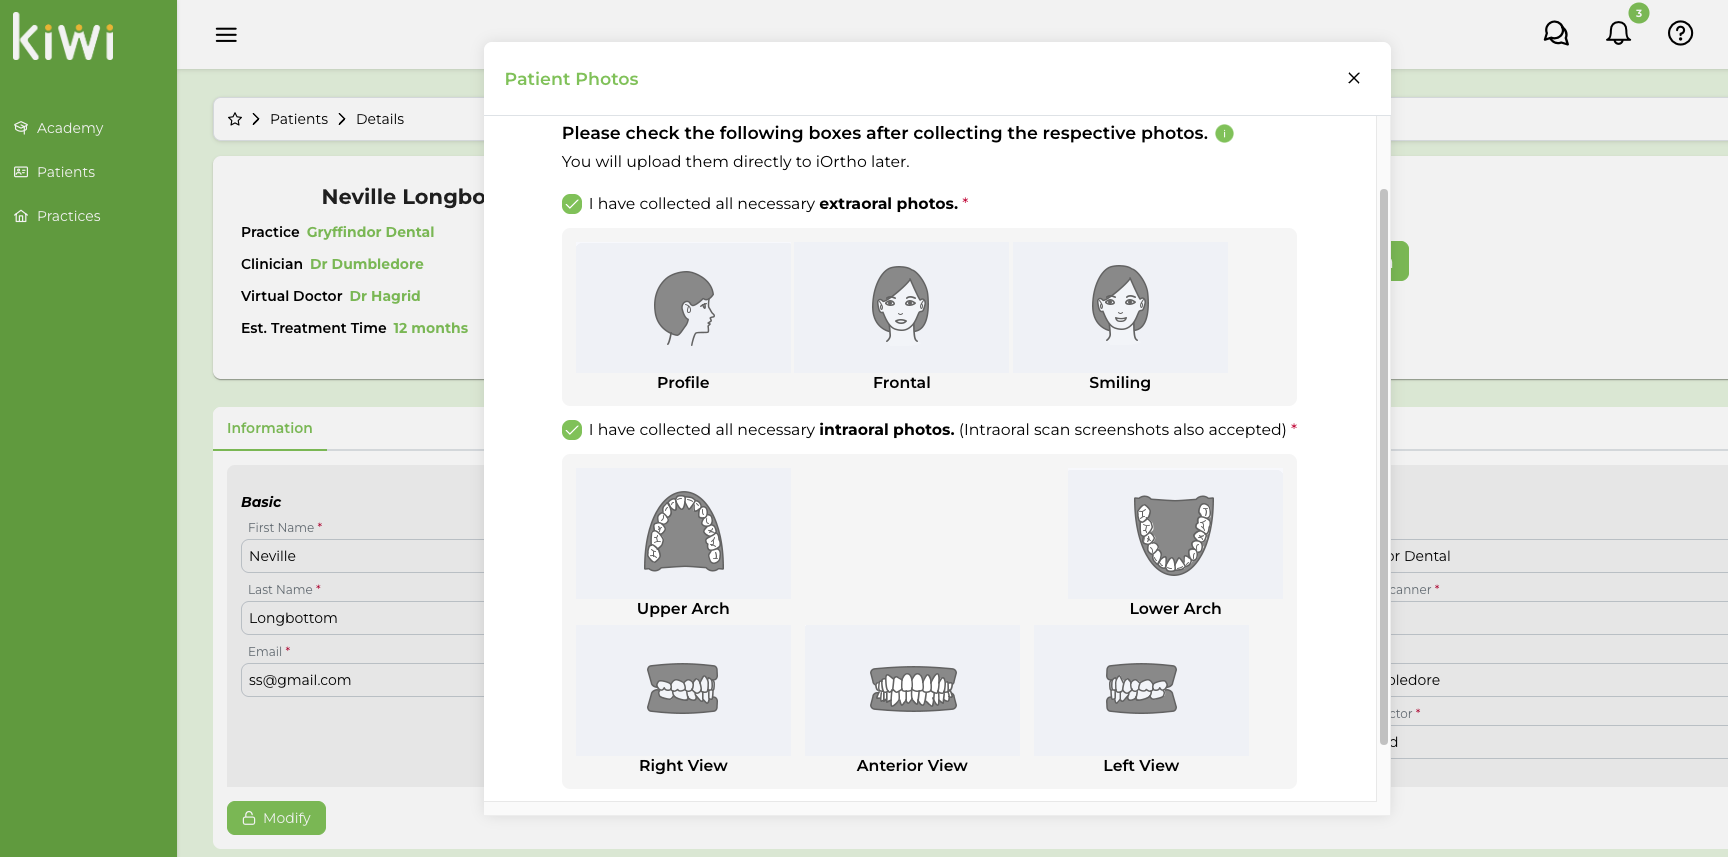
- Complete the required Patient Photos and check the boxes
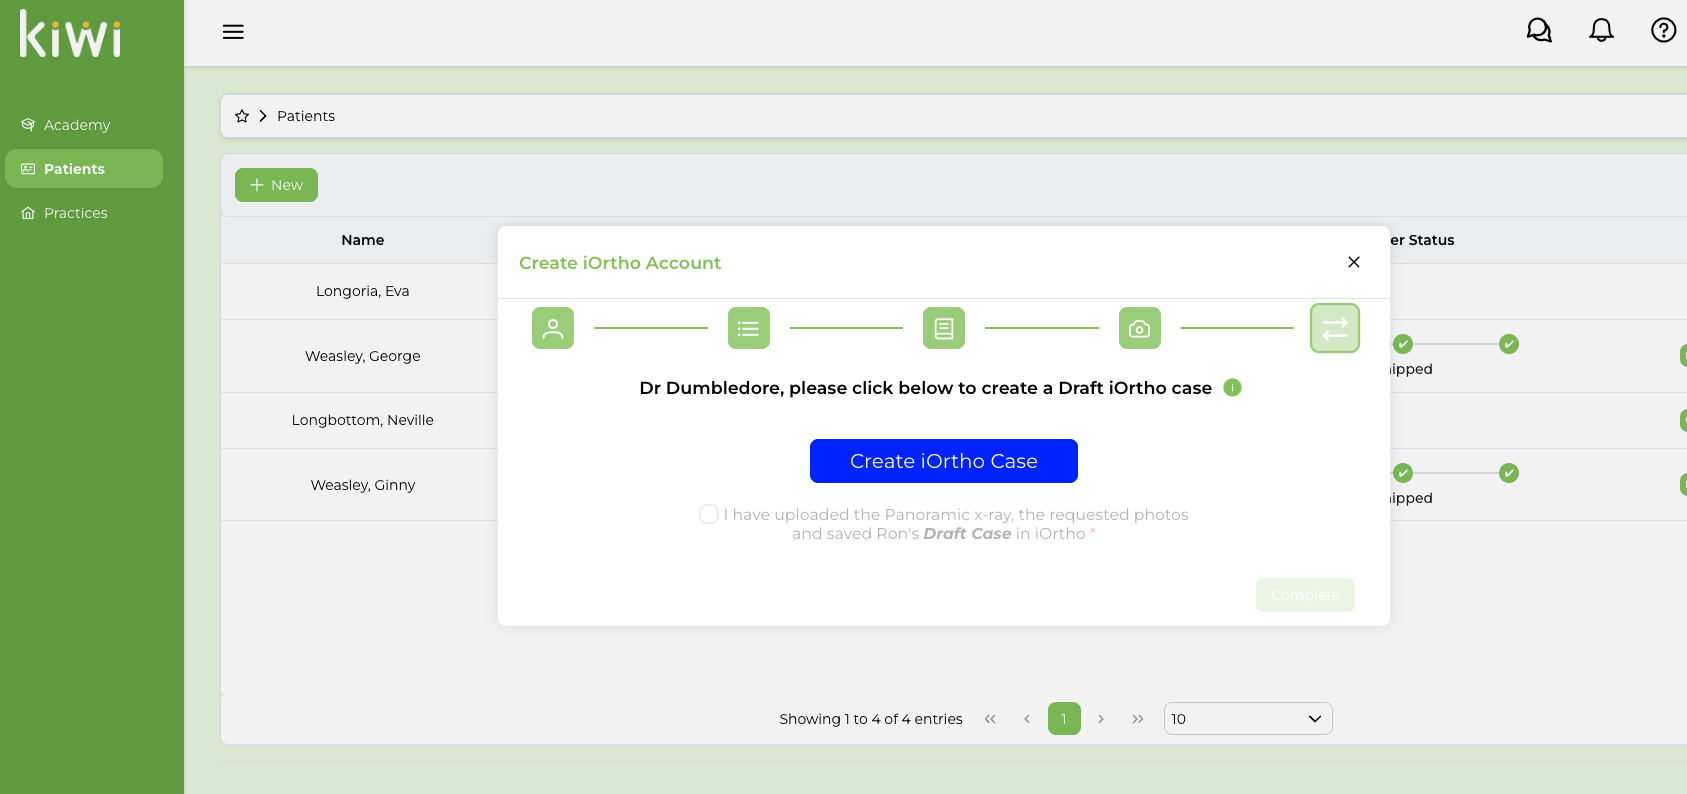
- Click on Create iOrtho Case
- Click on New Patient
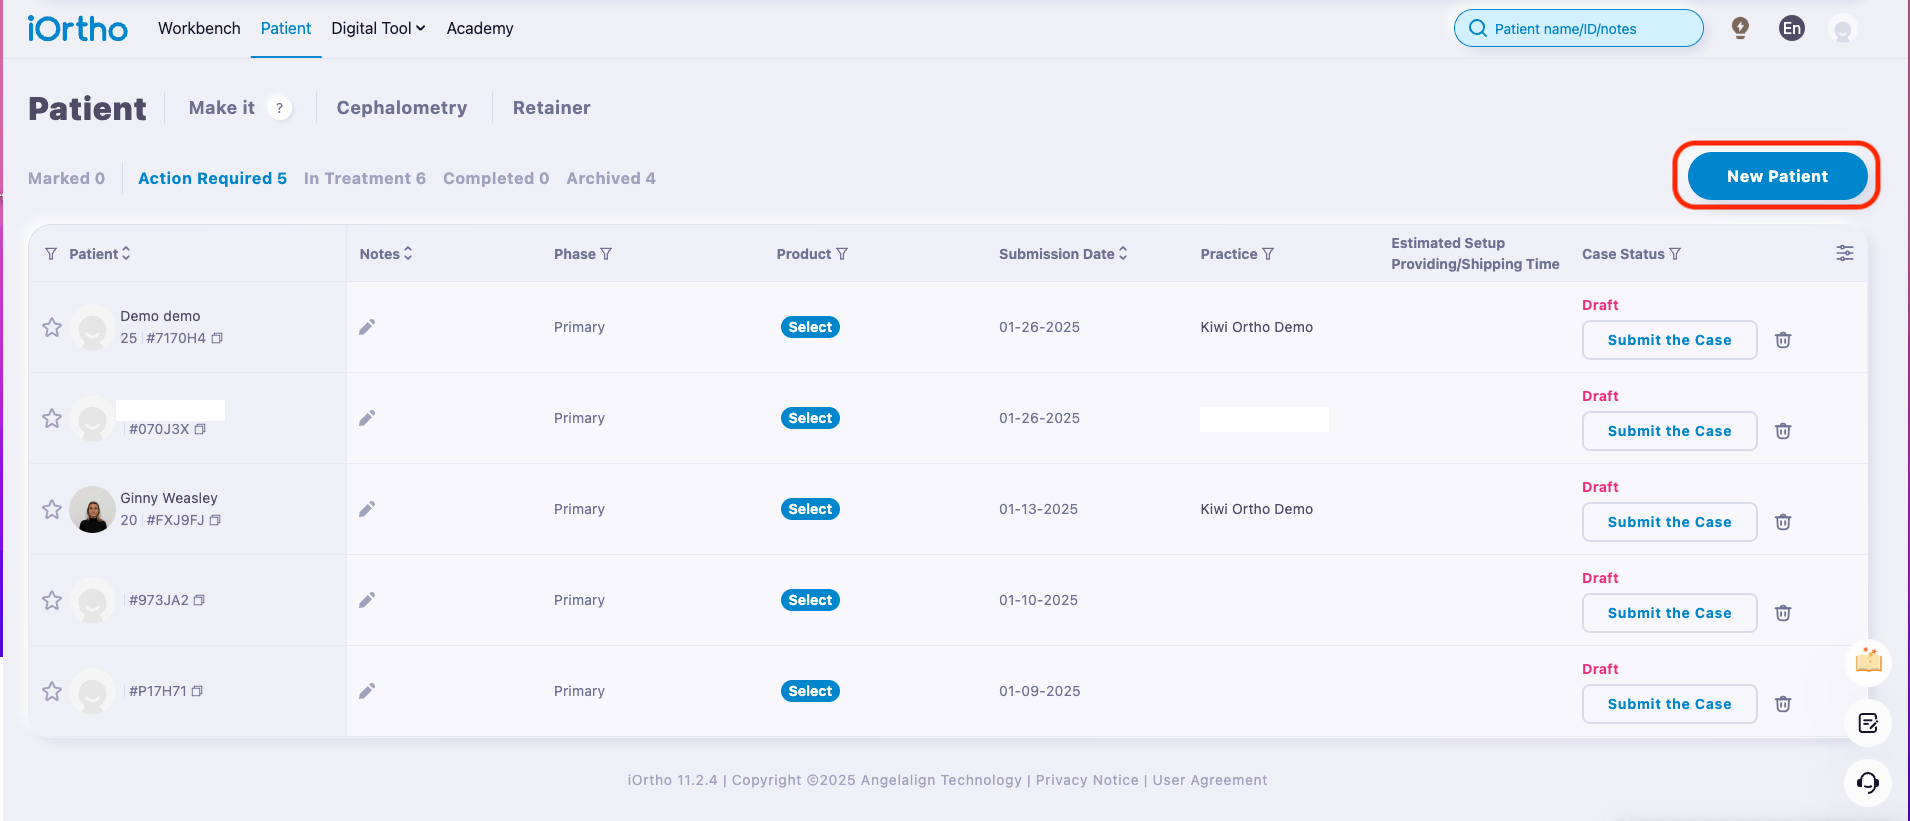
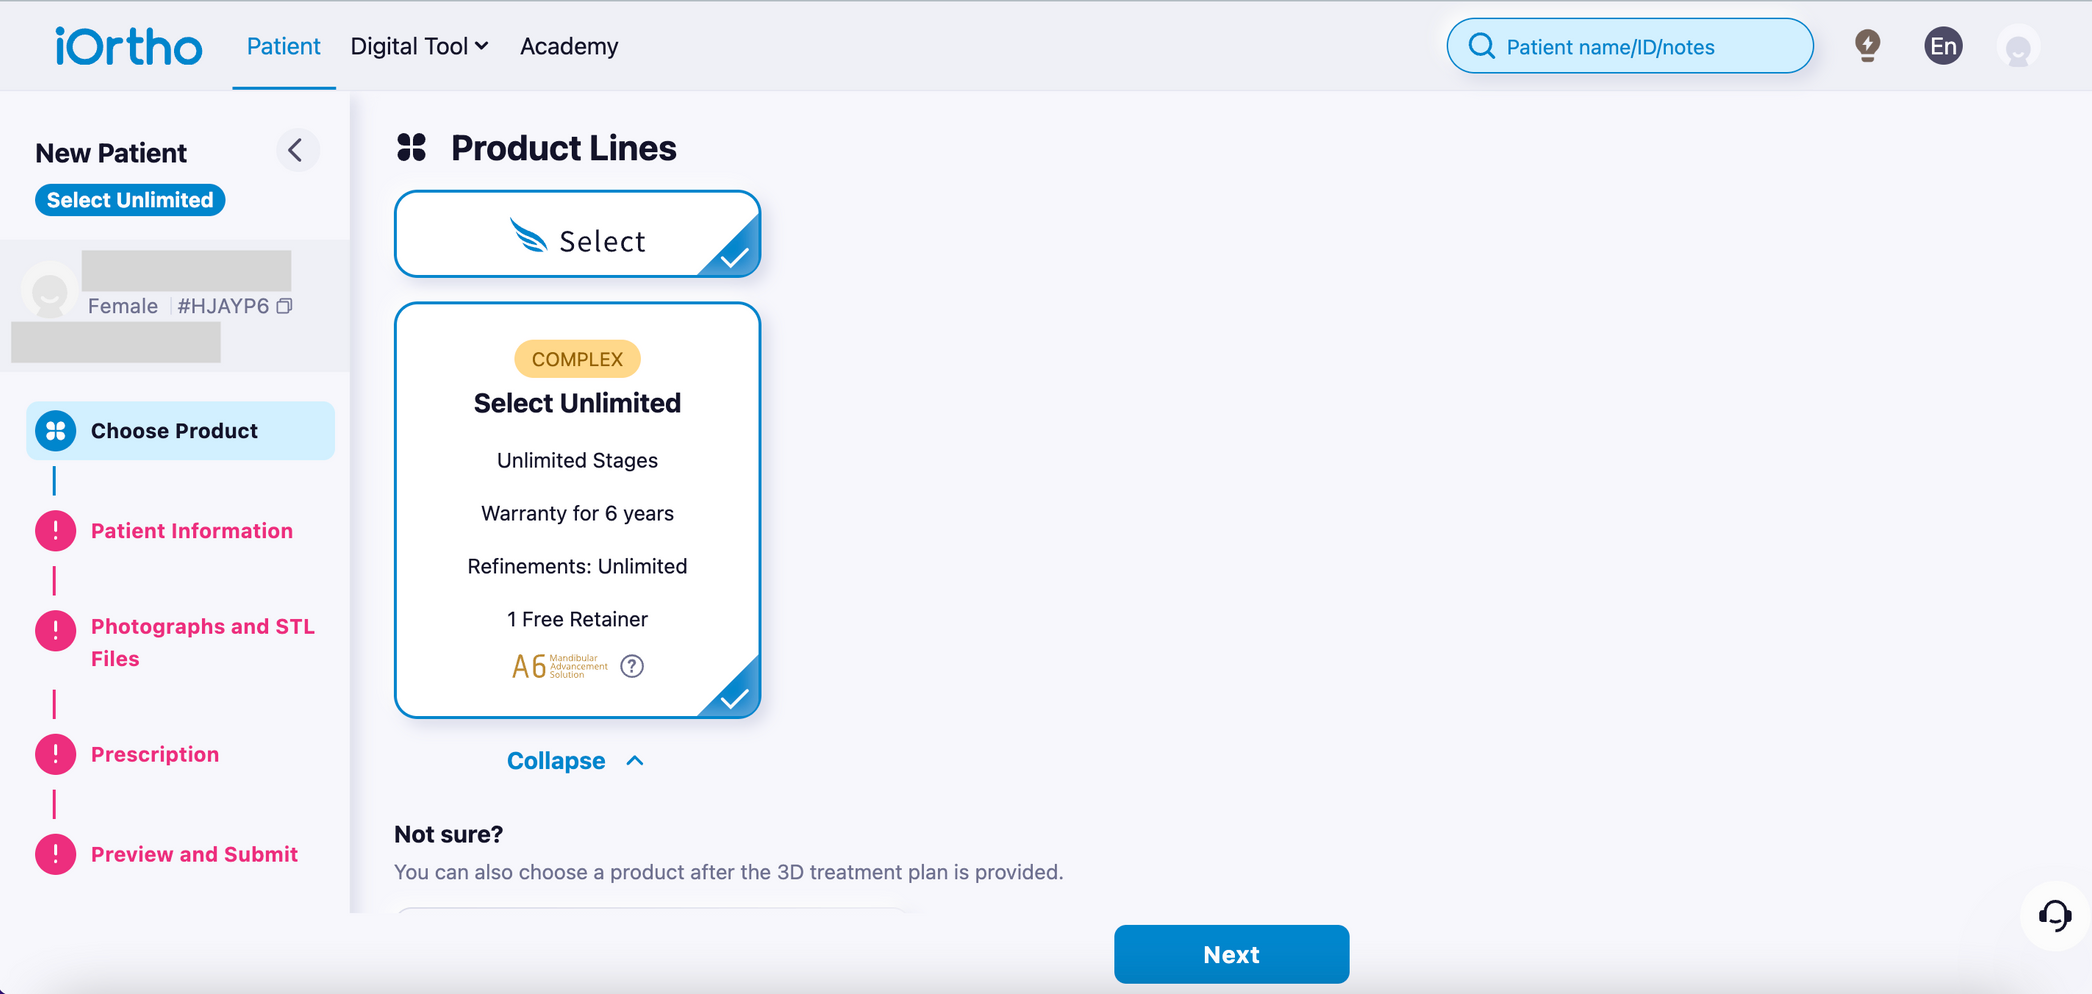
- Click on “Select” > “Select Unlimited” > “Next”
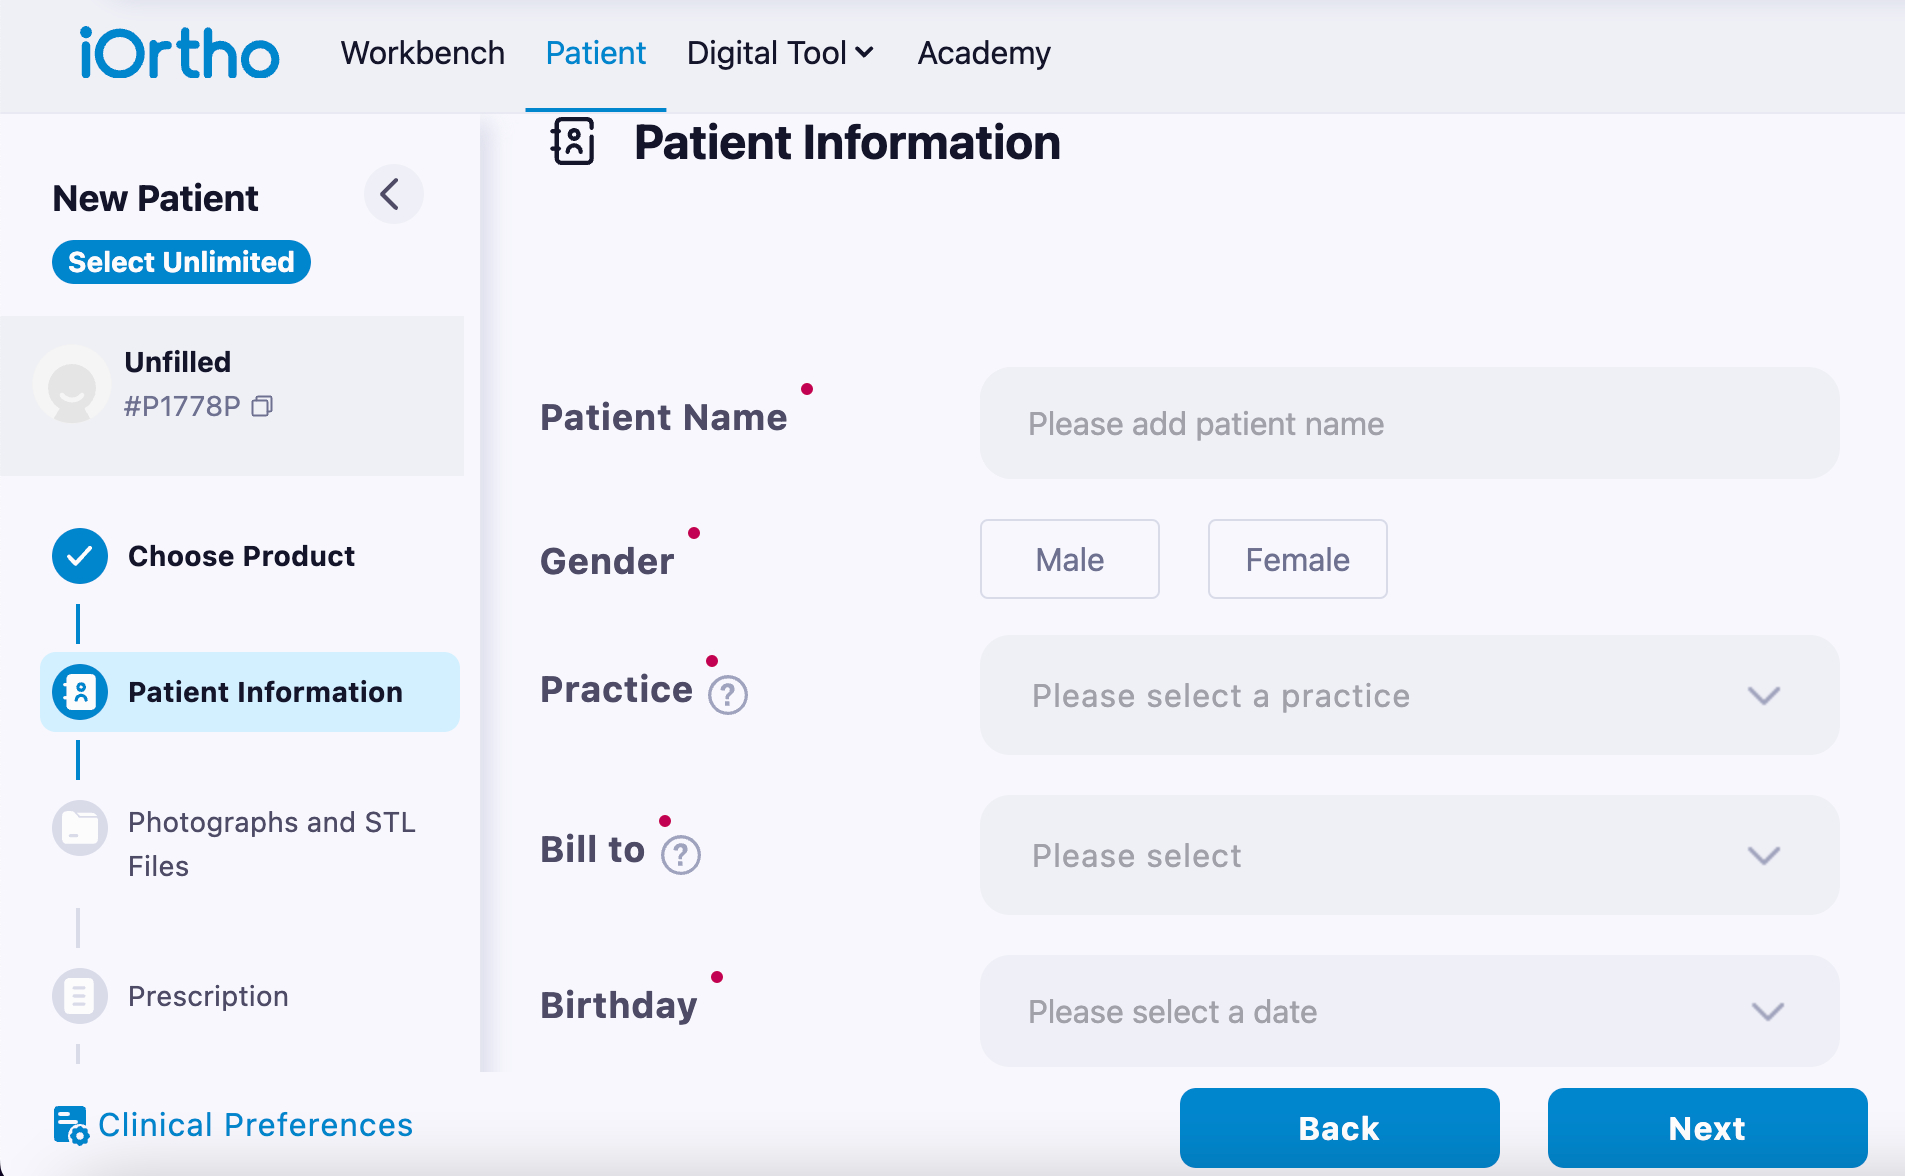
- Fill out the patient’s information (no need to fill out the Diagnosis below) and click Next.
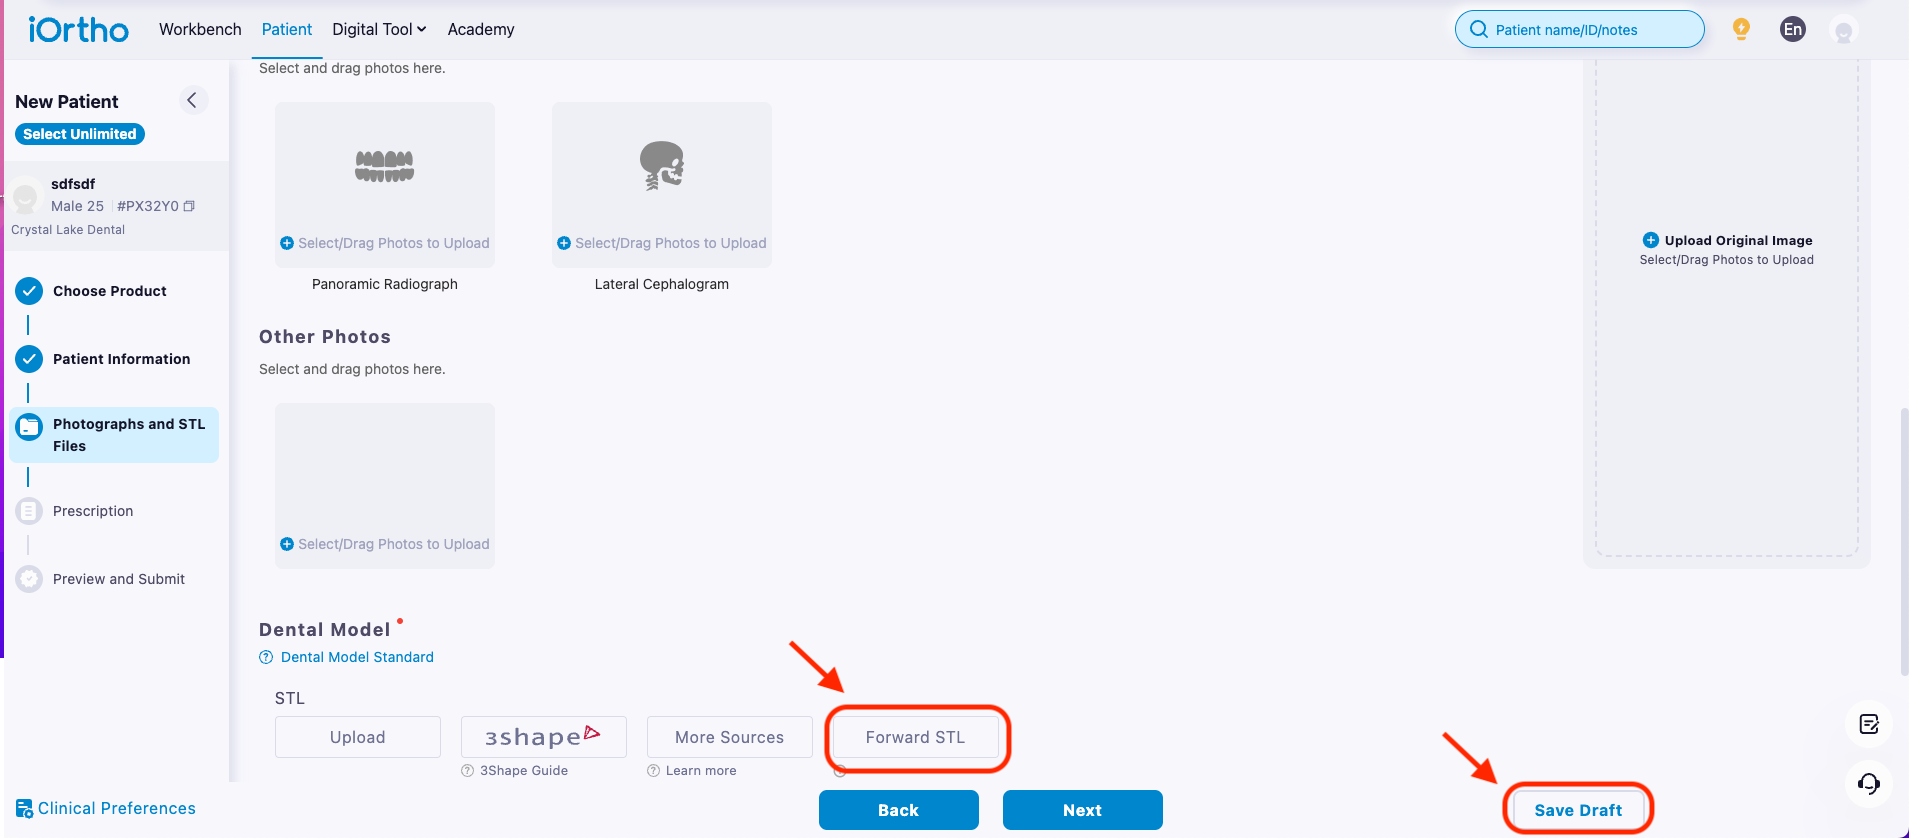
- Upload the photos and the Panoramic x-ray at the designated fields.
- Click on “Forward STL”
- Then click on “Save Draft” and exit the page.
- Return to kiwi and complete the patient registration
- If there is any additional information that you want your orthodontist to know about this case (e.g. patient’s chief concern), then go to the patient’s card in kiwi, open the communication tab, write a message and select “Send to Dental Care Specialists only”.
- You can exit all pages at this point. No further action needed on your end. At this point your orthodontist will prepare the treatment simulation (at no cost for you). They will be then reaching out to walk you through it.
- Let the patient know that they will receive an invitation email from Dental Monitoring to download the app prior to their Initial Delivery (ID) appointment. Ask the patient to follow the instructions in the email.
- Dismiss the patient
4. Accept/present simulation
Once you receive the treatment simulation from your orthodontist, you can:
Approve it (this is where you get charged for the case) if the patient has already agreed with the treatment or
Review it with the patient to show them the treatment plan in detail. You can do this by:
calling the patient back in the office and/or
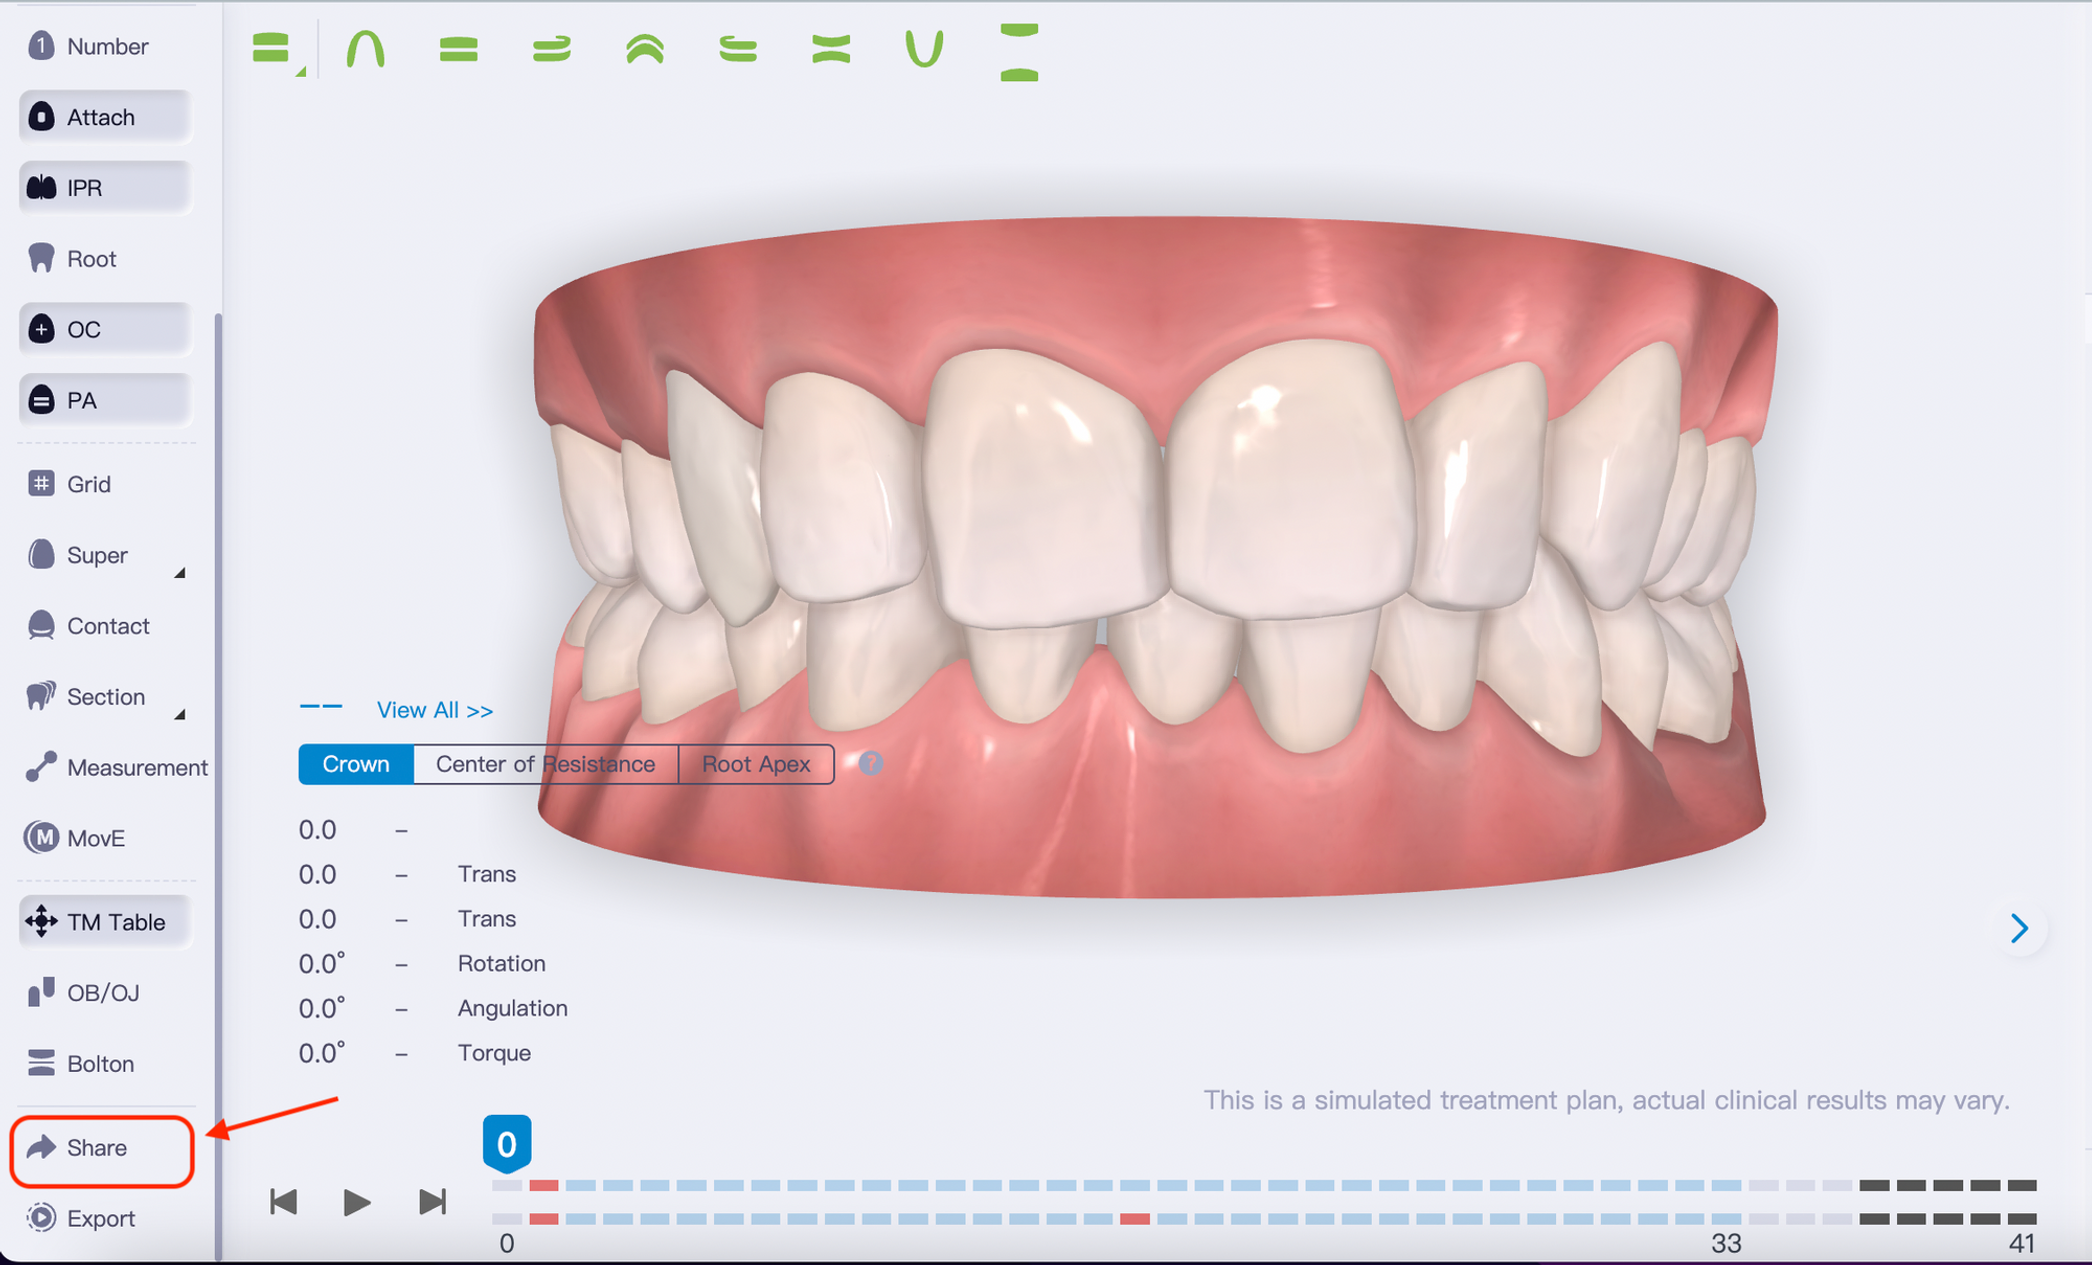
sending them a view-only version of the simulation. To do that:
- Go to the end of the left side bar in the treatment simulation and click on Share.
*Remember: The number of aligners do not indicate treatment time, since refinements are in most cases necessary. Always base your estimated treatment time on the questionnaire results
- turn on the bar and click on Create Sharing URL
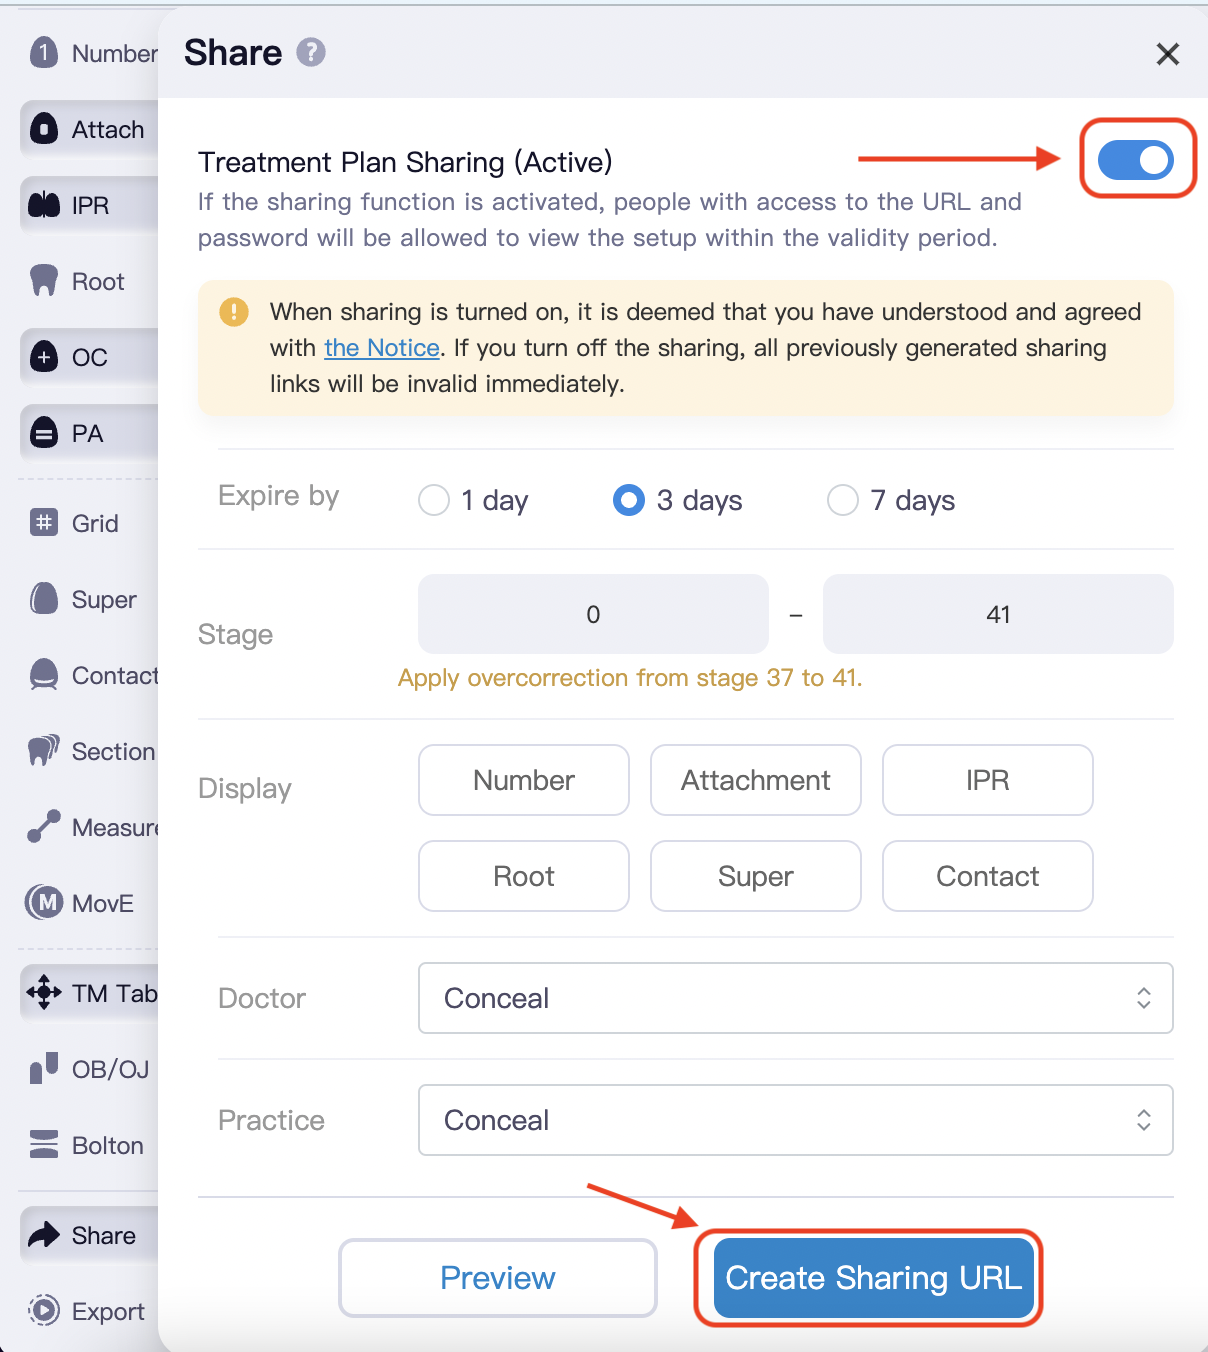
- Share this URL with your patient
Make sure that you checked all the to-do list and dismiss the patient.